Painting linoleum floors
 It wouldn’t be the new year without some new improvements happening around the hizzle! We are doing a huge main bathroom overhaul within the next week that I’ll be posting about soon, but in the meantime, I give you painting linoleum floors! I completed this project right before the holidays. Here’s how it all went down:
We have the fugliest floors covering half our house and as much as I’d love to just rip them all out, it’s just not in the cards quite yet. I suspect it’ll be when we remodel the kitchen in like 10+ years. L-a-m-e.
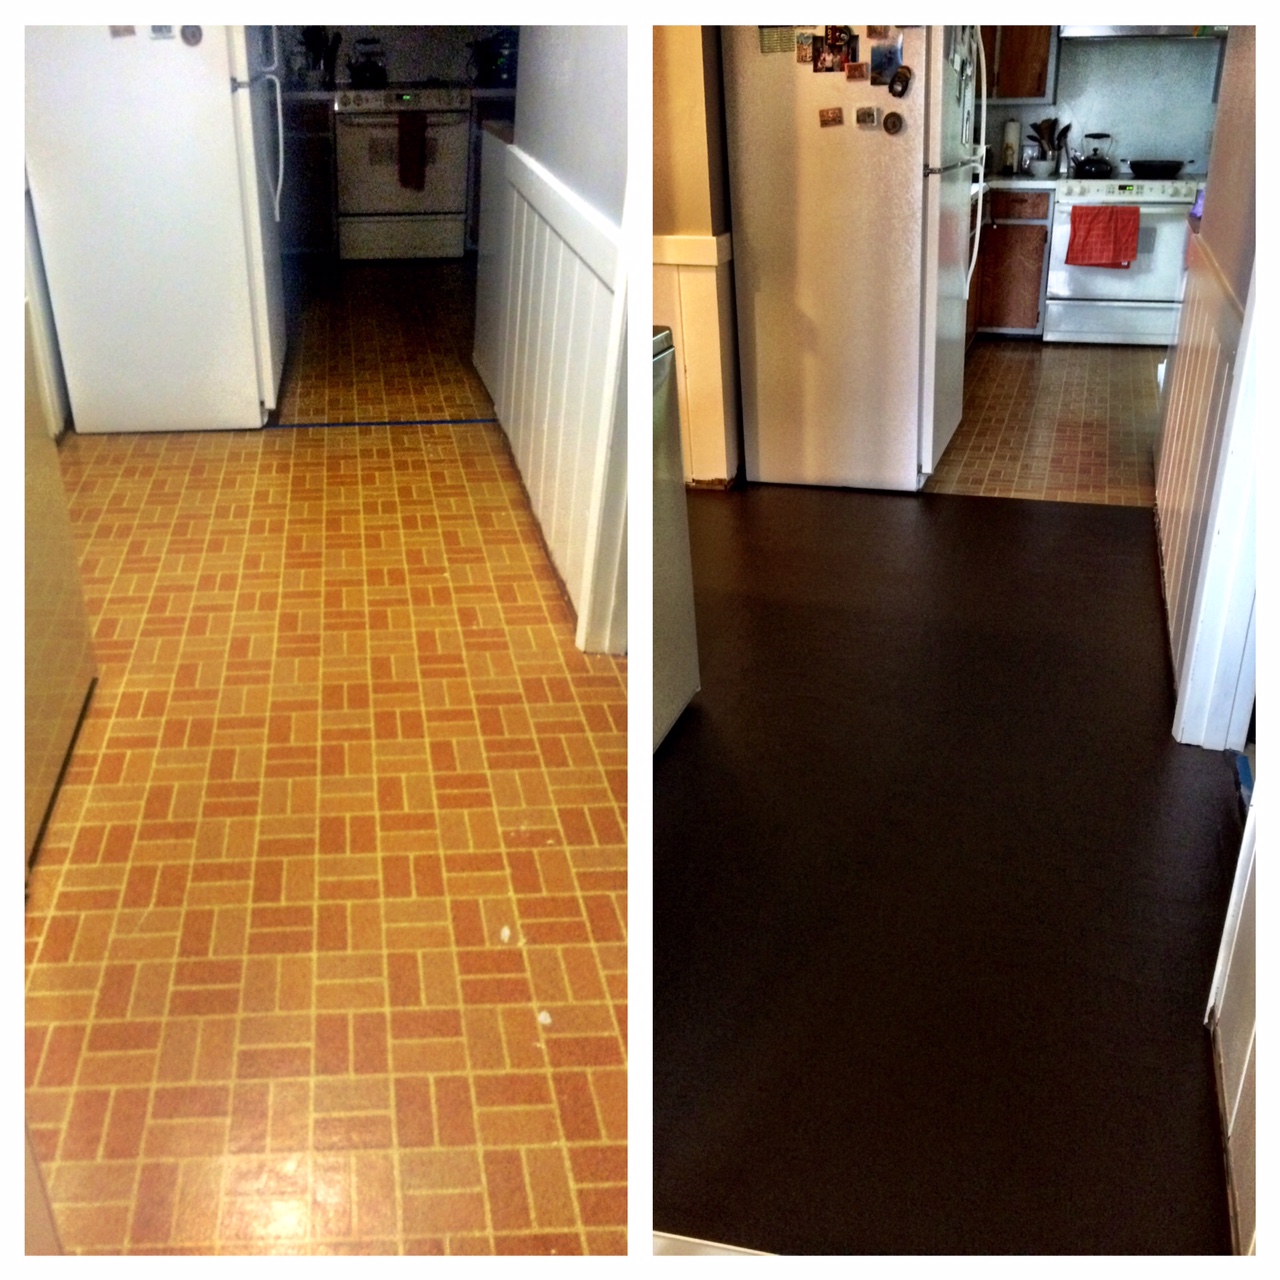
The ugliness goes from our hallway/laundry area, into the half bath and ends in the kitchen. I hate, hate, hate the rust color. It goes with NOTHING and is just plain dated. No matter how I decorated or rearranged things, the color was not going away. I wanted a temporary, inexpensive fix that would blend in with our hardwood floors in the entry and allow me to actually style our spaces a bit. In comes good ole Pinterest and a post about painting over vinyl/linoleum floors. Genius! This is a high traffic area and I did worry about it not holding up, but I’m always open to trying something new if it doesn’t break the piggy bank.
So here’s what I did:
- Found a dark brown paint that matched the hardwood floors. I used a porch/floor paint like the article suggested.
- Removed the old, plastic trim from all of the areas. I knew I was going to replace it anyways so off it went.
- Swept and washed the floors with soap and water. I guess I could have TSP’ed it, but I was a bit lazy.
- Taped off anything I didn’t want to get paint on. I only taped my prized TOTO toilet and the place where I wanted the paint to stop.
- Applied one thin coat of primer with a brush and a roller. Dried with a large box fan.
- Applied two coats of paint with a brush and a roller. Dried with a large box fan.
- Applied two coats of sealer with just a brush. The roller didn’t work well with the thinness of the sealer. Dried with a large box fan.
This took me one day for the primer and paint, then a second afternoon for the sealer. I originally thought the paint would hold up by itself, but after a week I got a bit concerned with chipping and scratching so researched a “greener” type sealer. I ended up going with AMF Safecoat Hard Sealer. The Green Depot in Seattle carries all sorts of ‘green’ products like this. A bit pricey, but so great to have that option.
I’ve been fairly happy so far as to how things turned out. It was an easy project that made a world of difference in those spaces. I just hope it holds up!
**Update: We’ve had the floors for about two months now and they aren’t holding up like I’d like them to. The sealer seemed to help a bit, but we’ve still had some major scratches. We also had to replace our washer and dryer and that unfortunately led to many new chips. I tried touching them up, but the additional coats of sealer have left a hazy glaze over places. If you have to touch spots up, I’d recommend just using the paint and not the sealer. Lesson learned.