Brewing kombucha at home

Homebrewed kombucha
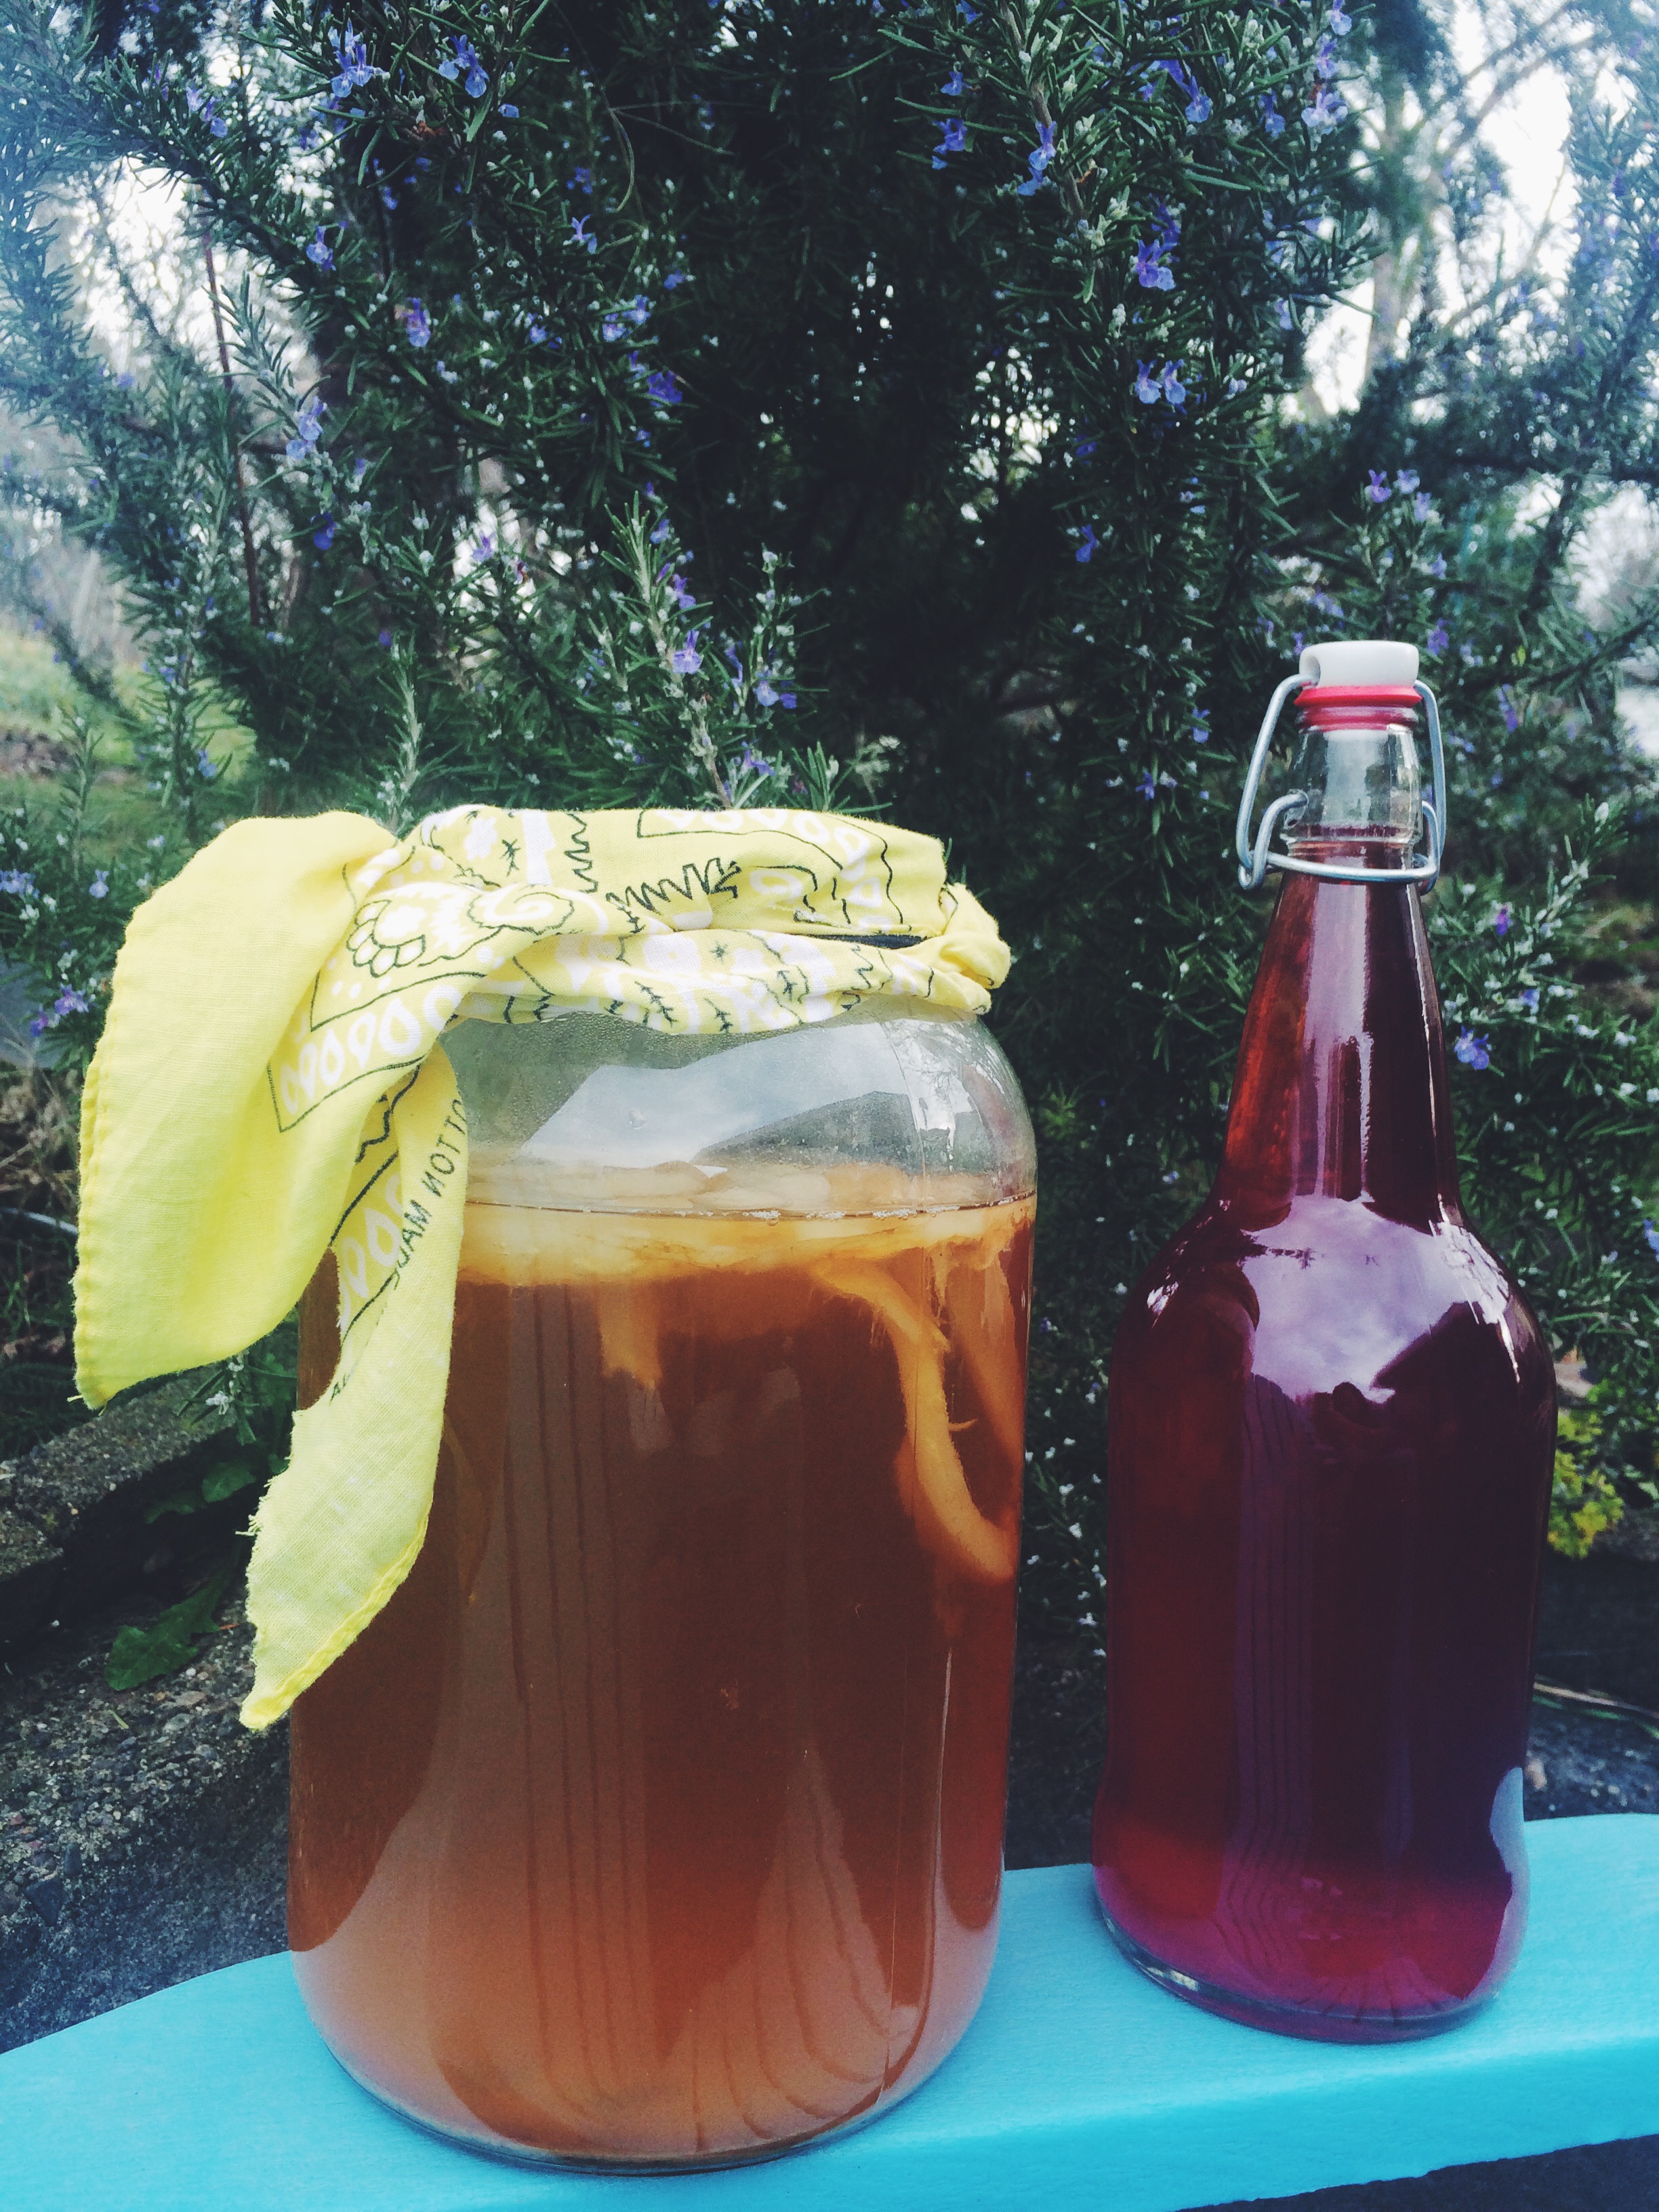
Oh fermentation. I’ve got a big ole fat crush on you and all of the yummy things you create! I’ve been interested in trying to brew my own kombucha at home but you know me, I’m a visual person and like to see something done by an expert first. Luckily, my friends at the Beacon Food Forest had a 101 class a few months ago that I eagerly signed up for. Three delish samples and 1.5 hours later and I felt like I could totally do this at home.

By no means am I an expert, but I wanted to share with you what I’ve learned so far. If you love kombucha as much as I do, but hate the $4+ price tag for a single bottle, well then home brewing just might be the way for you to go!

DIRECTIONS for Continuous Brewing
*Generously provided by Rowan Maya Lang*

Supplies needed:
1 kombucha mother (aka SCOBY) in 4 oz. of “starter” tea – you’ll need to get this from a homebrewer such as myself! Happy to share!
1 cup organic sugar
7 bags organic tea OR 1/4 cup loose leaf tea (green or black tea is preferred!)
1 large pot
1 fine-mesh strainer
2 two gallon wide mouth glass jars (PCC or brewing stores carry them for around $5 each) one for brewing and one for the SCOBY hotel if you continuous brew
1 gallon filtered or distilled water
1 square, clean cotton cloth, such as a napkin or bandanna
Rubber band or string to secure cloth over top of jar
1 straw for testing your first ferment
Smaller jars or bottles for final product or second fermentation (optional)

How to brew:

  1. Wash your hands and brewing containers thoroughly with soap and water to remove any unhealthy bacteria and reduce chances of mold or other contaminants.
  2. Bring 1 gallon of water to a roiling boil and stir in 1 cup sugar and 1/4 cup loose leaf teas or tea bags. Remove from heat, cover and leave overnight to cool.
  3. When cool, pour your tea-sugar mixture through a fine-mesh strainer and into the 1 gallon wide mouth glass jar being sure to leave 3 to 4 inches of space at the top of the jar. You’ll want some leftover liquid for your SCOBY Hotel (mentioned in step 6 below). Slide your kombucha mother into the container along with the 4 oz. of starter tea. It should float nicely!
  4. Secure cloth with rubber band or string on the top of the jar and place it in a cupboard or closet where it will be undisturbed and out of direct sunlight for 5 to 10 days. Check every few days for mold, which will be a very obvious black, green or blue fuzz. A healthy brew will naturally grown strands of yeast, which appear as gold or brown strands in the liquid hanging from the bottom of the mother. A normal mixture will also grow a “baby” on the top of the tea-sugar mixture, even if the mother has sunk to the bottom. It will start our as a thin, milky white membrane and will grow in thickness.
  5. At day 5, have a little taste of your tea. A straw is an easy tool for checking! You may like it sweet/tart and mildly fermented at days 5 to 7 or if you find it’s too sweet, then let it brew for a few more days. Check daily until desired acidity is reached. Fermentation speeds up in the hot summer months and slows way down in the wintertime. Add a heating pad or a string of lights in the winter months helps keep fermentation speedy.
  6. Once your kombucha is at your preferred taste level, remove the mother and baby with clean hands. Peel them apart and place one in the second wide mouth jar (SCOBY Hotel) and pour 4 oz. of leftover tea-sugar liquid to cover. The other SCOBY will stay in the current jar with it’s own 4 oz. of fermented liquid to repeat the process!
  7. Strain kombucha tea through fine-mesh strainer basket into your small jars. Refrigerate and enjoy!

DIRECTIONS for Continuous Brewing – Second Fermentation (where you can add flavors and get a ton of fizz!) (more…)

facebooktwitterpinterestinstagram

New Year, New Thoughts

IMG_8150I’ve been experimenting with making do with less (especially around my wardrobe), and this story is spot on.

Vowing to add more quinoa to our menu rotation. I’m inspired (and hungry).

26 things every person should do for themselves at least once a year: #3 – check! #8 – check! #21 is a 2016 goal and #16 is an awfully good idea. All great food for thought as we start off 2016.

I’m a morbid thinker and this article plays into all of those fears about how much time we have left. I’m so grateful that I live close by my loved ones.

Impulse bought these jeans. They remind me that spring is right around the corner.

I love looking at Shutterbean’s ‘My Everyday Life’ photos each week. They remind me just how amazing day to day life can be if you pay attention to the little things.

I’m guilty of duality thinking all of the time (something I’m hoping to work on) and am starting to realize how powerful happy gratitude can be. Now if I can just find that inner grace stuff…..

facebooktwitterpinterestinstagram

Bathroom Remodel: Before

IMG_8413Well, we pulled the trigger and just completed our main bathroom remodel! Guys, I’m so excited about this! We’ve been bathing in a fairly disgusting, chipping green tub for the past two years and I’d been dreaming about the day when it’d head to the dump (along with the green, bum-pinching toilet and tiny sink!) Mark January 5, 2016 as the day folks! It finally happened.

We left the actual remodel to the professionals and hired Sanco Construction per a co-workers recommendation. Owner Scott and I chatted about what Adam and I wanted back in mid-December and he gave us a very reasonable estimate and timeline. I’d got a few other bids, but they must think a gal like me is s-t-u-p-i-d because they overbid, like way overbid. I’m not going to pay $20k for a new bathroom unless it’s 100% gold yo! One even directed all of the questions to Adam, even though it was well established that I was the woman in charge. Cool guys, real cool. But I digress…

We didn’t mess with the footprint at all as the space is quite small. They only thing we added was a ceiling fan because showers = maj steam. Not sure how the previous owner went without one! We also didn’t go crazy with high end fixtures or tile work. We just wanted a timeless, clean look. So here’s where we started (I’m almost embarrassed to show these!) Looking forward to sharing the final after pictures with you shortly! Stay tuned…

IMG_8421IMG_8416IMG_8410

facebooktwitterpinterestinstagram

Quinault Lodge

Quinault LodgeJust thought I’d share a few thoughts from our quick side trip to Lake Quinault Lodge. We had some extra time to kill on the way down to the ocean over the new year holiday and I knew that it would be best spent headed back to a beloved childhood destination. My family spent many a mid-winter break (remember elementary school break?!) at the lodge. I’ve got nothing but THE BEST memories from this special place – swimming in the pool for hours on end, playing ping pong in the game room, sitting by the fire at night playing cards, hiking the nature trail – it was a lil slice of heaven for us kids. It’s also the place where we laid my grandpa to rest almost 18 years ago. In fact, the last time I saw him was on the way to the lodge, in the Duffy’s restaurant parking lot in Aberdeen. I recall him not looking well in the passenger’s side of their truck – he wasn’t able to go inside for his favorite slice of blackberry pie, which should have been a red flag for me. My teenage brain just didn’t comprehend how serious it was. Shortly thereafter he was admitted to the local hospital and passed away a few days later due to pneumonia complications. That parking lot was the last time I ever saw him.

His ashes, along with some of our dearest dogs, are spread on the Quinault River and not to get too morbid on you…I want to be put there too. It’s a beautiful, secluded spot miles up the river surrounded by moss covered trees and snow capped mountain sides. It’s so quiet, and so still. So peaceful. I haven’t been there in at least 15 years and it meant a lot to me to show my husband this special, special place, reminisce a bit and most importantly say hello to him. It had been far too long. I wrote him a message on the ice covered bridge, gave him the family updates and told him how much I missed him. It was a sad but extremely meaningful visit. I’m so glad we went. Lake Quinault Lodge Boathouse

Rain gauge at Quinault LodgeQuinault River, Washington State

facebooktwitterpinterestinstagram

Painting linoleum floors

The good and the bad when painting linoleum floorsIt wouldn’t be the new year without some new improvements happening around the hizzle! We are doing a huge main bathroom overhaul within the next week that I’ll be posting about soon, but in the meantime, I give you painting linoleum floors! I completed this project right before the holidays. Here’s how it all went down:

We have the fugliest floors covering half our house and as much as I’d love to just rip them all out, it’s just not in the cards quite yet. I suspect it’ll be when we remodel the kitchen in like 10+ years. L-a-m-e.

The ugliness goes from our hallway/laundry area, into the half bath and ends in the kitchen. I hate, hate, hate the rust color. It goes with NOTHING and is just plain dated. No matter how I decorated or rearranged things, the color was not going away. I wanted a temporary, inexpensive fix that would blend in with our hardwood floors in the entry and allow me to actually style our spaces a bit. In comes good ole Pinterest and a post about painting over vinyl/linoleum floors. Genius! This is a high traffic area and I did worry about it not holding up, but I’m always open to trying something new if it doesn’t break the piggy bank.

So here’s what I did:

  1. Found a dark brown paint that matched the hardwood floors. I used a porch/floor paint like the article suggested.
  2. Removed the old, plastic trim from all of the areas. I knew I was going to replace it anyways so off it went.
  3. Swept and washed the floors with soap and water. I guess I could have TSP’ed it, but I was a bit lazy.
  4. Taped off anything I didn’t want to get paint on. I only taped my prized TOTO toilet and the place where I wanted the paint to stop.
  5. Applied one thin coat of primer with a brush and a roller. Dried with a large box fan.
  6. Applied two coats of paint with a brush and a roller. Dried with a large box fan.
  7. Applied two coats of sealer with just a brush. The roller didn’t work well with the thinness of the sealer. Dried with a large box fan.

This took me one day for the primer and paint, then a second afternoon for the sealer. I originally thought the paint would hold up by itself, but after a week I got a bit concerned with chipping and scratching so researched a “greener” type sealer. I ended up going with AMF Safecoat Hard Sealer. The Green Depot in Seattle carries all sorts of ‘green’ products like this. A bit pricey, but so great to have that option.

I’ve been fairly happy so far as to how things turned out. It was an easy project that made a world of difference in those spaces. I just hope it holds up!

**Update: We’ve had the floors for about two months now and they aren’t holding up like I’d like them to. The sealer seemed to help a bit, but we’ve still had some major scratches. We also had to replace our washer and dryer and that unfortunately led to many new chips. I tried touching them up, but the additional coats of sealer have left a hazy glaze over places. If you have to touch spots up, I’d recommend just using the paint and not the sealer. Lesson learned.

Related Posts Plugin for WordPress, Blogger...facebooktwitterpinterestinstagram